Are you feeling a little overwhelmed by the thought of building your own shed? Don't worry, it's easier than you think! In this guide, we'll break down the process into simple steps that even a beginner can follow. We'll cover everything from selecting the right materials to putting on the finishing touches. Before you know it, you'll have a beautiful new shed in your backyard that you built yourself.
Building a Hip Roof Shed: Design Considerations, Materials, and Steps
Get link
Facebook
X
Pinterest
Email
Other Apps
Introduction
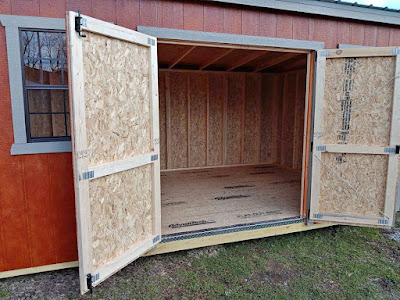
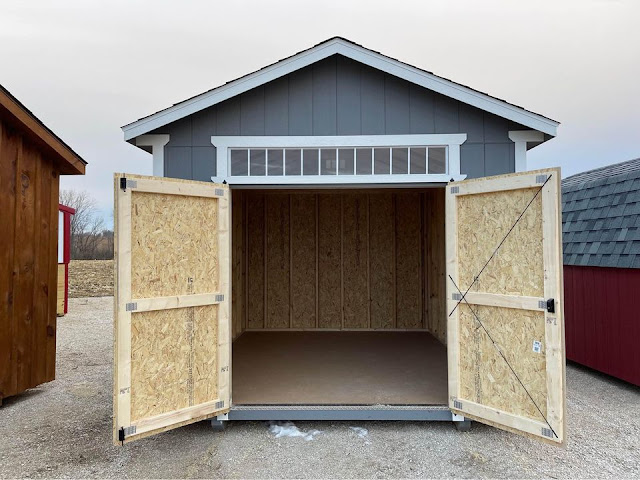
If you're looking for a sturdy and attractive outdoor storage solution, a hip roof shed may be the perfect choice. Hip roofs are characterized by their four sloping sides, which provide added stability and a classic, timeless look that complements any home's style. In this article, we'll discuss the design considerations, materials, and steps needed to build a hip roof shed, as well as maintenance tips to keep your shed in top condition.
Design Considerations
Before you start building your hip roof shed, there are a few design considerations to keep in mind:
Size: Determine how much storage space you need, and plan your shed accordingly. Consider the size and number of items you'll be storing, as well as any future storage needs.
Location: Choose a location for your shed that is close to your home and convenient to access. Consider factors such as sun exposure, drainage, and proximity to trees and other structures.
Style: Choose a style of hip roof shed that complements your home's architecture and style. Consider factors such as color, trim, and siding options.
Building codes: Check with your local building codes to ensure that your shed meets all requirements and permits.
Materials Needed for Building
To build a hip roof shed, you'll need the following materials:
Lumber for framing and roofing
Plywood or OSB for sheathing
Roofing materials such as shingles or metal roofing
Nails, screws, and other fasteners
Door hardware
Concrete or other materials for the foundation
Step-by-Step Guide to Building a Hip Roof Shed
Here is a basic step-by-step guide to building a hip roof shed:
Step 1: Choose your location
Choose a location for your hip roof shed that is close to your home and convenient to access. Ensure that the ground is level and provides proper drainage to prevent water damage.
Step 2: Prepare the site
Prepare the site by leveling the ground and ensuring proper drainage. You may also need to pour a concrete slab or lay down a foundation of pavers or other materials.
Step 3: Frame the shed
Using lumber, frame the walls and roof of your hip roof shed. Make sure to leave a space for the door, and install any necessary bracing to ensure stability.
Step 4: Install the sheathing
Install plywood or OSB sheathing on the walls and roof of your shed.
Step 5: Install the roofing
Install your chosen roofing material on the roof of your shed, making sure to properly seal all seams and edges to prevent water damage.
Step 6: Install the door
Install the door and any necessary hardware, such as hinges and a latch.
Step 7: Finish the shed
Add any finishing touches to your hip roof shed, such as trim, paint, or siding, to match your home's style.
Maintenance Tips for a Hip Roof Shed
To keep your hip roof shed in top condition, here are a few maintenance tips:
Regularly inspect the roof for any signs of damage or wear, such as missing shingles or cracks in the roofing material.
Keep the gutters clean and free of debris to prevent water damage to the shed and its foundation.
Trim back any nearby trees or foliage to prevent damage from falling branches or leaves.
Apply a coat of sealant or paint every few years to protect the wood from the elements and prolong its lifespan.
Conclusion
A hip roof shed is a great addition to any backyard, providing both functionality and style. By following the design considerations, materials, and steps outlined in this article, you can build a sturdy and attractive shed that will last for years to come. Just remember to keep up with regular maintenance to keep your shed in top condition.
x Introduction Preparation Building the Foundation Building the Frame Building the Walls Building the Roof Installing the Doors and Windows Finishing Touches Conclusion Introduction Building a storage shed is a great way to create additional storage space for your home. A 10x10 storage shed is a popular size and can be used for a variety of purposes, such as storing gardening equipment, tools, or outdoor furniture. In this article, we will provide a step-by-step guide on how to build a 10x10 storage shed. Preparation Before you start building your storage shed, it is important to do some preparation work. This includes selecting the location for the shed, obtaining any necessary building permits, and gathering all the required tools and materials. You will need a hammer, saw, drill, measuring tape, level, and screws, as well as lumber, roofing materials, and siding. Building the Foundation The first step in building your storag...
Introduction Designing a Gable Shed Roof Building a Gable Shed Roof Ventilation for Gable Shed Roofs Maintenance and Repair of Gable Shed Roofs Conclusion A gable shed roof is a popular roofing style for backyard sheds and small buildings. It features two sloping sides that meet at a peak or ridge in the middle, creating a triangular shape at each end. The gable shed roof has several benefits, including increased headroom, improved ventilation, and simple construction. In this article, we will discuss how to design, build, and maintain a gable shed roof. Designing a Gable Shed Roof When designing a gable shed roof, there are several factors to consider, such as the pitch and size of the roof, as well as the materials you will use. The pitch of the roof refers to the angle at which it slopes, and this will affect how much headroom you have inside the shed. The size of the roof will depend on the size of your shed and the am...
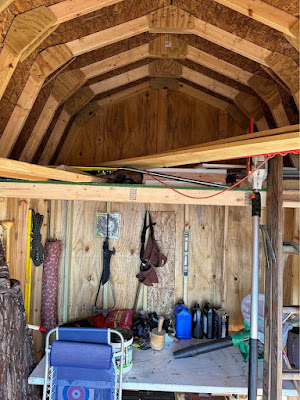
s Introduction Design of a Gambrel Shed with Loft Benefits of a Gambrel Shed with Loft Construction of a Gambrel Shed with Loft Maintenance of a Gambrel Shed with Loft Introduction A gambrel shed with loft is a practical and attractive storage solution that offers additional space for storage or use as a living area. This article will explore the design, benefits, construction, and maintenance of a gambrel shed with loft. Design of a Gambrel Shed with Loft A gambrel shed with loft is designed with a unique roof style that provides additional headroom and storage space. The gambrel roof has two slopes on each side, with the lower slope being steeper than the upper slope. This design allows for a spacious loft area, while still maintaining a traditional and aesthetically pleasing exterior. Gambrel Roof Design The gambrel roof design is a popular choice fo...

Comments
Post a Comment